I had an issue where I was moving all users from one database to another.
The plan was to delete the original database but I wasn't able to, this was because I had to move the arbitration mailbox.
Open up Exchange Powershell and type in:
Get-Mailbox -Arbitration | New-MoveRequest -TargetDatabase "name of new database"
After running the above command , Arbitration will be moved and you'll be able to delete the old database.
Friday, 29 January 2016
Wednesday, 27 January 2016
Export all your Exchange Email Addresses to CSV
This below command works with Exchange 2007 and 2010.
Open up exchange powershell and type this:
Get-Mailbox -ResultSize Unlimited |Select-Object DisplayName,ServerName,PrimarySmtpAddress, @{Name=“EmailAddresses”;Expression={$_.EmailAddresses |Where-Object {$_.PrefixString -ceq “smtp”} | ForEach-Object {$_.SmtpAddress}}} | Export-CSV c:\emails.csv -NoTypeInformation
This will extract the users into a nice excel sheet in the C Drive for you to use.
-------------
To export the usernames and inbox sizes use the command below:
Get-mailbox | get-mailboxstatistics | sort-object totalitemsize –descending | ft displayname,totalitemsize | Export-CSV c:\emails.csv -NoTypeInformation
Friday, 8 January 2016
Windows Updates stuck on "Restart your PC to finish installing updates"
A Windows 8 pc I was working on was stuck on "Restart your PC to finish installing updates"
I found a Microsoft fix it tool to resolve the issue.
This tool resets the Windows Updates Components.
Link valid for Windows 7, Windows 8, and Windows 8.1: http://go.microsoft.com/?linkid=9830262
Third party Link valid for Windows 7, Windows 8, and Windows 8.1:
Optional: I've found clearing the Cache can help as well! post link here:
Thursday, 7 January 2016
Add new WatchGuard internet connection
Decided to make a picture guide on how to add a new connection to a watchguard oooo...


Step 1: Logon to your WatchGuard (Guessing you know how to configure a WatchGuard)
and go to Policy Manager

Step 2:Next go to "Network" in the top tab on Policy Manager and open Configuration from the drop down menu.
Step 3:Go to interfaces tab and choose an unused connection and then select Configure in the top right hand corner.

Step 4: Next open the IPV4 tab and fill in the Interface Name: call it External for example.
Then from the drop down interface type choose External from the list.
Following this choose the option "Static ip" and fill in the details with an ip address and default gateway provided from the ISP.

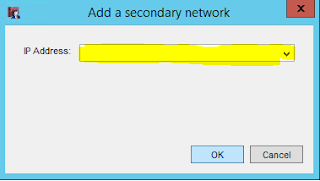
Optional Step 5: If you don't have any additional IP's with the internet connection click okay, if you do you have additional ip's go to the Secondary Tab at the top of interface settings. Then click the "Add" button on the far right.

Optional Step 6: Clicking add will make a new box appear.
Type in the ip and click ok. (You have to add each ip address manually) Repeat the process Step 5 and Step 6 to add more ip's.

Wednesday, 6 January 2016
Remove [SPAM] from the header of an email
So I spent a good portion of a day trying to figure this one out.
And it was resolved in roughly 30 seconds!
To fix it you should have a mail server and Eset Mail Security.
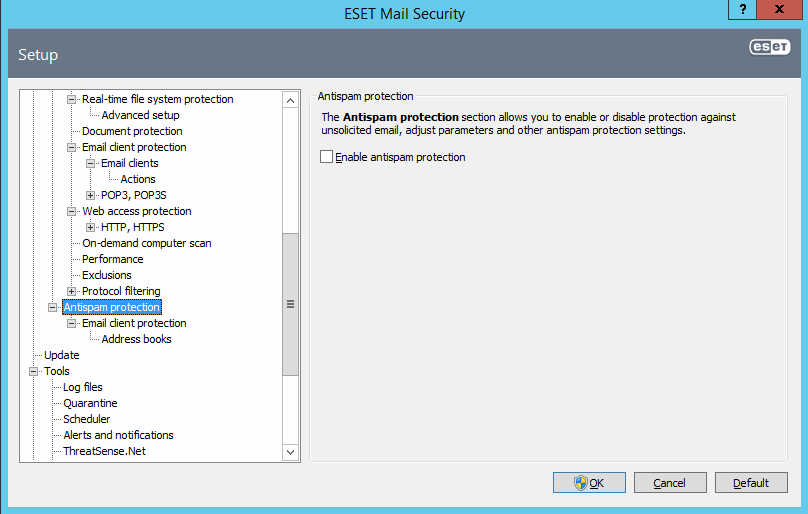
Eset mail security is causing the message [SPAM] to appear in emails.
To resolve this disable AntiSpam protection.
- Press F5 in Eset Mail Security
- Then untick AntiSpam Protection
Both at the top and bottom
Both at the top and bottom
Screenshot below:

User logged in multiple times Remote Desktop 2012R2
To configure the Restrict each user to a single session setting on the RD Session Host server
- On the RD Session Host server, open Remote Desktop Session Host Configuration. To open Remote Desktop Session Host Configuration, click Start, point to Administrative Tools, point to Remote Desktop Services, and then click Remote Desktop Session Host Configuration.
- In the Edit settings area, under General, double-click Restrict each user to a single session.
- On the General tab of the Properties dialog box, select or clear the Restrict each user to a single session check box according to what is most appropriate for your environment, and then click OK.
You can also restrict users to a single session on the RD Session Host server by enabling the Restrict Remote Desktop Services users to a single remote session Group Policy setting. This Group Policy setting is located in Computer Configuration\Policies\Administrative Templates\Windows Components\Remote Desktop Services\Remote Desktop Session Host\Connections and can be configured by using either the Local Group Policy Editor or the Group Policy Management Console (GPMC).
Subscribe to:
Posts (Atom)